How to Fix Google Chrome Not Updating on Windows 10
While updating Google Chrome, during the update process, you may face several errors like, An error occurred while checking for updates: Update check failed to start (error code 3: 0x80040154).
How to Fix Google Chrome Not Updating on Windows 10 What are the Chrome Update Problems? How to Update Google Chrome Method 1: Restart PC Method 2: Restart Google Chrome Method 3: Clear Browsing History Method 4: Disable Extensions Method 5: Turn Off Compatibility Mode Method 6: Perform Disk Cleanup Method 7: Enable Google Update Services Method 8: Modify Windows Registry Method 9: Turn Off Windows Defender Firewall (Not Recommended) Method 10: Run Malware Scan Method 11: Reset Chrome Method 12: Reinstall Chrome
You will face this Chrome not updating problem if the Chrome updater cannot find its update server to begin the process. If you face the same error code while updating Google Chrome on Windows 10 and looking for a solution, then this article will help you.
What are the Chrome Update Problems?
If you face this problem in your device, you might encounter various errors listed below.
Update failed: Updates are disabled by an administrator Update failed (Error: 7 or 12) An error occurred while checking for updates: Download failed Update failed (Error: 4 or 10) An error occurred while checking for updates: Update check failed to start Update failed (Error: 3 or 11) An error occurred while checking for updates: Update server not available This computer will no longer receive Chrome updates because Windows XP and Windows Vista are no longer supported
Irrespective of the errors and update failed messages, you can follow the below discussed troubleshooting methods to fix Chrome not updating issue. But, before going through the methods you can try to update Chrome by following the steps given in the below section.
How to Update Google Chrome
If you face a Chrome update check failed error, then you can try installing the latest version manually. Here is how to do it.
Launch the Google Chrome browser.
Click on the three-dotted icon to expand the Settings menu.
Then, select Help > About Google Chrome as illustrated below.
Allow Google Chrome to search for updates. The screen will display Checking for updates message, as shown.
5A. If updates are available, click on the Update button. 5B. If Chrome is already updated then, Google Chrome is up to date message will be displayed.
If you are not able to update Google Chrome, then we have compiled a list of methods to fix this issue due to An error that occurred while checking for updates: Update check failed to start (error code 3: 0x80040154). The methods are arranged in ascending order from basic to advanced methods to resolve the same. If you want to attain the fix faster and within a few steps, follow the methods in the same order. Here we go!
Method 1: Restart PC
Before trying the rest of the methods, you are advised to reboot your system. In most cases, restarting your device will fix the issue without any challenging layouts. So, try to reboot your system by following the below-mentioned steps and checking if you face the problem again. Alternatively, you can fully shut down the system using the Power options and turn it on again.
- Navigate to the Start menu.
- Now, select the power icon. Note: In Windows 10, the Power icon is found at the bottom. Whereas in Windows 8, the Power icon is located at the top.
- Several options like Sleep, Shut down, and Restart will be displayed. Here, click on Restart.
Method 2: Restart Google Chrome
One of the easiest ways to fix Chrome not updating due to An error that occurred while checking for updates error is restarting Google Chrome. Restarting it will clear all the temporary files, and there are wide chances that you might attain a fix for your problem.
Launch Task Manager by hitting Ctrl + Shift + Esc keys simultaneously.
In the Processes tab, search and select the Chrome process.
Then, click on the End task button as depicted in the below picture.
Now, relaunch Google Chrome and check if you have fixed the issue. Also Read: How to Export Saved Passwords from Google Chrome
Method 3: Clear Browsing History
All the browsing history files will be stored as temporary files in your browser. When days pass, these files bulge in size, and corrupt files lead to Chrome not updating issues. Try clearing the browsing data files and check if you have fixed this issue.
Launch Google Chrome.
Then, click on the three-dotted icon > More tools > Clear browsing data… as illustrated below.
Check the following options.
Cookies and other site data Cached images and files
Now, choose the All time option for Time range.
Finally, click on Clear data.
Method 4: Disable Extensions
When you have too many tabs in your system, the browser & computer speed will be very slow and may slow down the update of Google Chrome, leading to this issue. In this case, your system will not operate normally, leading to the error code mentioned above. Now, you can try closing all the unnecessary tabs and restart your system. If you have closed all the tabs and still face the issue, try to disable all the extensions. Follow the below-mentioned instructions to delete the extensions from Google Chrome.
Launch Chrome and type chrome://extensions in URL Bar. Hit Enter key to get the list of all installed extensions.
Switch Off the toggle for the extension (e.g. Grammarly for Chrome) to disable it.
3. Refresh your browser and see if the error is shown again or not. 4. Repeat the above steps to disable the extensions one by one to check if the error is fixed or not. Also Read: How to Remove Bing from Chrome
Method 5: Turn Off Compatibility Mode
Google Chrome does not work with previous and older versions of Windows XP, Windows Vista, Mac OS X 10.6,10.7, and 10.8. You might have enabled compatibility mode enabled for your browser. Chrome is supported on the following Windows versions:
Windows 7 Windows 8 Windows 8.1 Windows 10 or later. A device with an Intel Pentium 4 processor or later capable of Streaming SIMD Extensions 3.
If your PC meets the system requirements and throws an error, This computer will no longer receive Google Chrome updates because Windows XP and Windows Vista are no longer supported during updating Chrome. To turn off the compatibility mode, follow the below-mentioned steps.
Right-click on the Google Chrome shortcut on the Desktop and select Properties.
Navigate to the Compatibility tab.
Now, uncheck the box Run this program in compatibility mode.
Finally, click on Apply and then OK to save the changes.
Now, relaunch the browser to see if the issue is fixed now.
Method 6: Perform Disk Cleanup
When your system has any corrupt Chrome or registry files, you will encounter Google Chrome won’t update problems. You can perform Disk Cleanup to fix this issue. Then, follow the instructions to implement the same. Note: The data deleted through Disk Cleanup are not permanently deleted from the system and remain available on your hard drive. You may recover the files whenever needed.
Launch File Explorer by hitting Windows + E keys together and go to This PC.
Here, right-click on the drive (C:) where Steam is installed and select Properties as depicted.
In the General tab, click on the Disk Cleanup button.
A prompt will appear and The Disk Cleanup will calculate the amount of space that can be made free.
Check the box for all desired items under Files to delete: and click Clean up system files.
Once the scanning is complete, again check the boxes for all the chosen items and click on OK.
Finally, click on the Delete Files button in the confirmation prompt.
Restart your PC. To clean up additional space, read 10 Ways to Free up Hard Disk Space. Also Read: Fix Crunchyroll Not Working on Chrome
Method 7: Enable Google Update Services
If the Google Update Services are disabled on your PC, you will face Google Chrome won’t update error. You can enable them manually by using the below-mentioned steps.
Hit the Windows + R keys simultaneously to open the Run dialog box.
Type services.msc and click on OK.
Now, scroll down the list and double-click on Google Update Service (gupdate).
Then, set the Startup type to Automatic or Automatic (Delayed Start).
Now, click on Apply and then OK to save the changes.
Again, scroll down to the list and double click on Google Update Service (gupdatem).
Then, set the Startup type to Manual.
Now, click on Apply > OK to save the changes.
Finally, reboot your PC and check if you have fixed Google Chrome won’t update issue.
Method 8: Modify Windows Registry
Modifying registry values in Windows Registry Editor might resolve error code 3: 0x80040154. Here are a few instructions to implement the same.
Launch the Run dialog box and type regedit and hit the Enter key.
Click Yes in the User Account Control prompt.
Now, navigate to the following path in the Registry Editor.
Now, in the right pane, right-click on UpdateDefault and select the Modify option. Note: If you couldn’t find the Updatedefault string, then try looking for the DefaultUpdate string.
Then, set the Value data of Updatedefault to 1 and click on the OK button.
Also Read: How to Enable DNS over HTTPS in Chrome
Method 9: Turn Off Windows Defender Firewall (Not Recommended)
Windows Defender may block Chrome due to security reasons. So, you can turn off Windows Defender Firewall to fix Google Chrome won’t update issue. Note: Disabling the firewall makes your system more vulnerable to malware or virus attacks. Hence, if you choose to do so, make sure to enable it soon after you are done fixing the issue.
Hit the Windows key, type Control Panel, and click on Open.
Set View by > Category and select System and Security settings.
Click on Windows Defender Firewall.
Select the Turn Windows Defender Firewall on or off option from the left pane, as highlighted.
Here, select the Turn off Windows Defender Firewall (not recommended) option for each available network setting viz Domain, Public & Private.
Finally, reboot your PC.
Method 10: Run Malware Scan
Google Chrome won’t update issue may arise if there is malware in your PC. So follow the given steps to run malware scan.
Hit Windows + I keys simultaneously to launch Settings.
Here, click on Update & Security settings as shown.
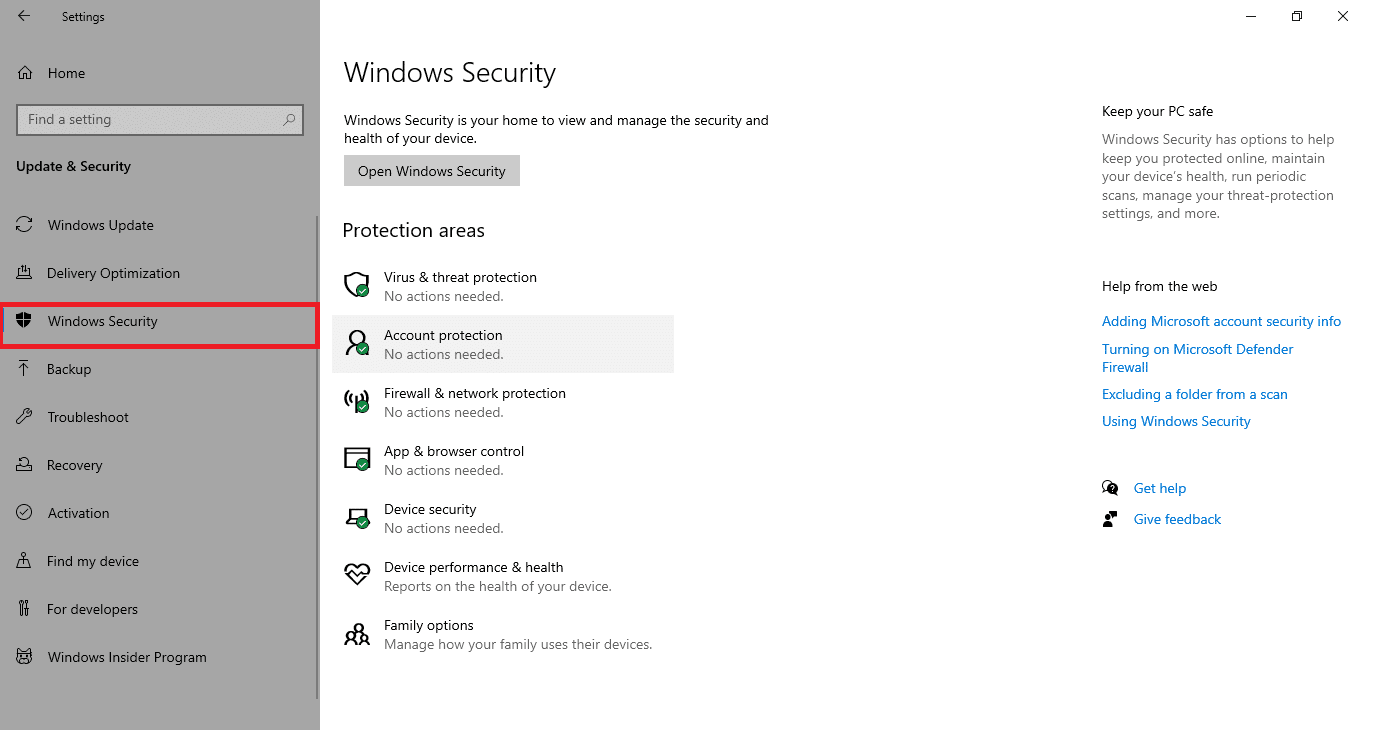
Go to Windows Security in the left pane.
Click on the Virus & threat protection option in the right pane.
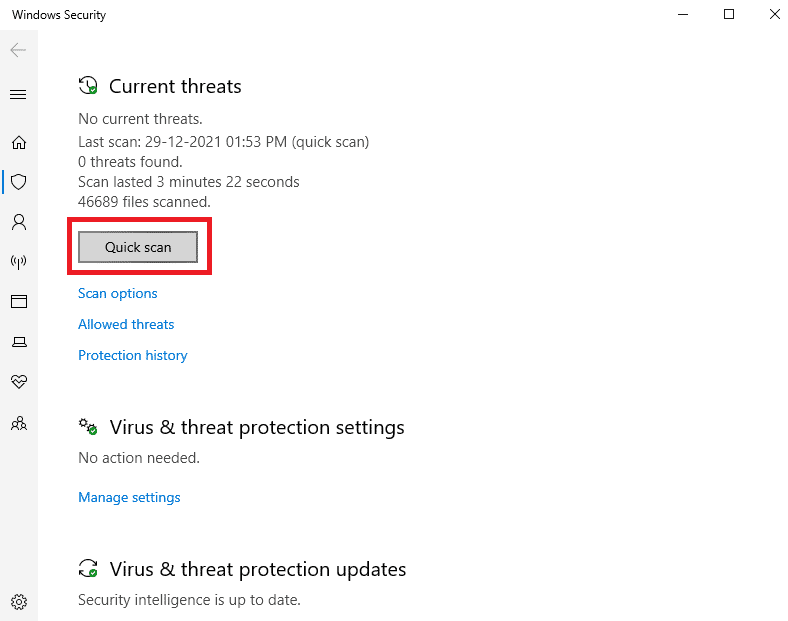
Click on the Quick Scan button to search for malware.
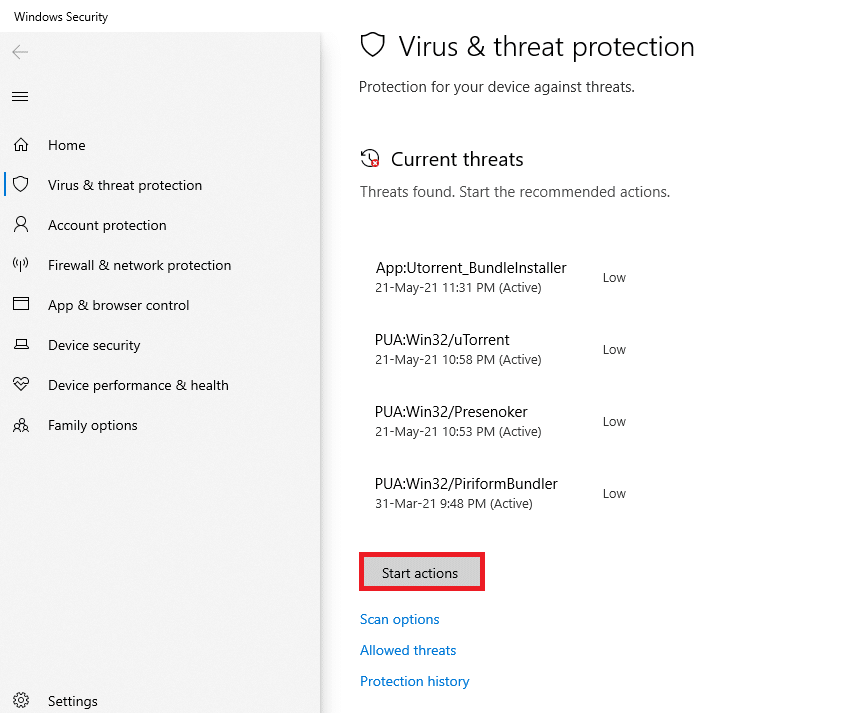
6A. Once the scan is done, all the threats will be displayed. Click on Start Actions under Current threats.
6B. If there is no threat in your device, the device will show the No current threats alert.
Also Read: Fix Chrome Blocking Download Issue
Method 11: Reset Chrome
Resetting Chrome will restore the browser to its default settings, and there are more possibilities that you can fix the discussed issue. Follow the below-mentioned steps to reset Google Chrome and check if the problem is resolved.
Open Google Chrome and go to chrome://settings/reset
Click on the Restore settings to their original defaults option, shown highlighted.
Now, confirm your action by clicking on the Reset Settings button.
Method 12: Reinstall Chrome
If none of those mentioned above methods has helped you fix Google Chrome won’t update issue, you can try reinstalling Google Chrome. Doing this will fix all the relevant issues with the search engine, updates, or other related problems triggering Chrome update problems. Note: Back up all favorites, saved passwords, bookmarks and sync your google account with your Gmail. Uninstalling Google Chrome will delete all the saved files.
Hit the Windows key, type apps and features, and click on Open.
Search for Chrome in Search this list field.
Then, select Chrome and click on the Uninstall button shown highlighted.
Again, click on Uninstall to confirm.
Now, press the Windows key, type %localappdata%, and click on Open to go to AppData Local folder.
Open the Google folder by double-clicking on it.
Right-click on the Chrome folder and select the Delete option as depicted below.
Again, hit the Windows key, type %appdata%, and click on Open to go to AppData Roaming folder.
Again, go to the Google folder and delete the Chrome folder as shown in steps 6 – 7.
Finally, restart your PC.
Next, download the latest version of Google Chrome as shown.
Run the setup file and follow the on-screen instructions to install Chrome.
Recommended:
Fix Host Process for Setting Synchronization Fix Discord Keeps Crashing Fix AdBlock Not Working on Twitch 14 Ways to Fix Chrome Profile Error
We hope that this guide was helpful and you were able to fix Chrome not updating on Windows 10. Let us know which method worked for you the best. Also, if you have any queries/suggestions regarding this article, then feel free to drop them in the comments section.