Realtek HD Audio Manager is one of the best tools available for managing all your audio/sound needs in Windows 10. But what happens when you can’t find the Realtek HD Audio Manager icon on the Taskbar? Most of the users facing this issue complain that they are only having this issue after the Windows 10 upgrade or update.
There can be numerous underlying causes for this issue, but the main problem seems to be corrupt or outdated Realtek audio drivers. And if that’s the case, this issue can be fixed by re-installing Realtek audio drivers. Anyway, without wasting any time, let’s see How to Fix Realtek High Definition Audio Driver Issue. Note: Open Device Manager by pressing Windows Key + R then type devmgmt.msc and hit Enter. Next, expand Sound, video and game controllers and then check if you can see a yellow exclamation mark on “Realtek High Definition Audio“. If you can see the yellow exclamation mark then its confirm that this is a driver issue.
Fix Realtek High Definition Audio Driver Issue
Make sure to create a restore point just in case something goes wrong.
Fix Realtek High Definition Audio Driver Issue Method 1: Reinstall Realtek HD Audio Drivers Method 2: Manually Update Realtek Audio Drivers Method 3: Use Add legacy to install drivers to support older Sound Card Method 4: Uninstall Realtek High Definition Audio Driver Method 5: Disable Microsoft UAA Bus Driver for High Definition Audio
Method 1: Reinstall Realtek HD Audio Drivers
Open your favourite web browser, then navigate to this website.
Make sure to download the proper driver according to your system architecture.
Once the file is downloaded, double-click on the setup file and follow the on-screen instructions to install the latest Realtek High Definition Audio drivers.
Method 2: Manually Update Realtek Audio Drivers
Press Windows Key + R then type devmgmt.msc and hit Enter to open Device Manager.
Expand “Sound, video and game controllers” and then right-click on “Realtek High Definition Audio” & select Update driver.
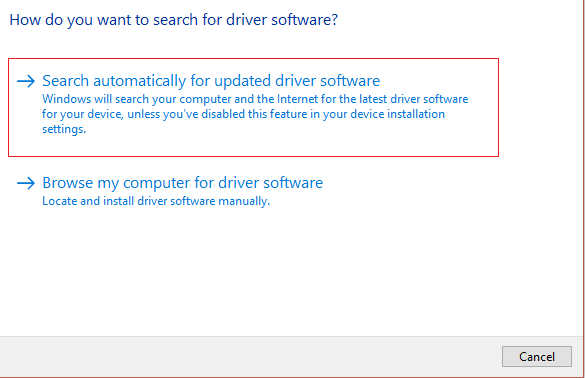
On the next window, click on “Search automatically for updated driver software“.
In case you already have the updated driver, then the following window will appear. If not then Windows will automatically update Realtek Audio drivers to the latest update available.
Once finished, reboot your PC to save changes. If you’re still facing the Realtek High Definition Audio Driver Issue then you need to manually update the drivers, follow this:
If it wasn’t able to update your drivers then again right-click on “Realtek High Definition Audio” & select Update driver.
This time, select “Browse my computer for driver software.“
Next, select “Let me pick from a list of device drivers on my computer.”
Select the appropriate driver from the list and click Next.
Let the process complete and then restart your PC.
Alternatively, go to your manufacturer’s website and download the latest drivers.
Method 3: Use Add legacy to install drivers to support older Sound Card
Press Windows Key + R then type “devmgmt.msc” (without quotes) and hit enter to open Device Manager.
In Device Manager, select Sound, video and game controllers and then click on Action > Add legacy hardware.
Click Next, select ‘Search for and install the hardware automatically (Recommended).’
Reboot your system to save changes and see if you’re able to Fix Realtek High Definition Audio Driver Issue.
Method 4: Uninstall Realtek High Definition Audio Driver
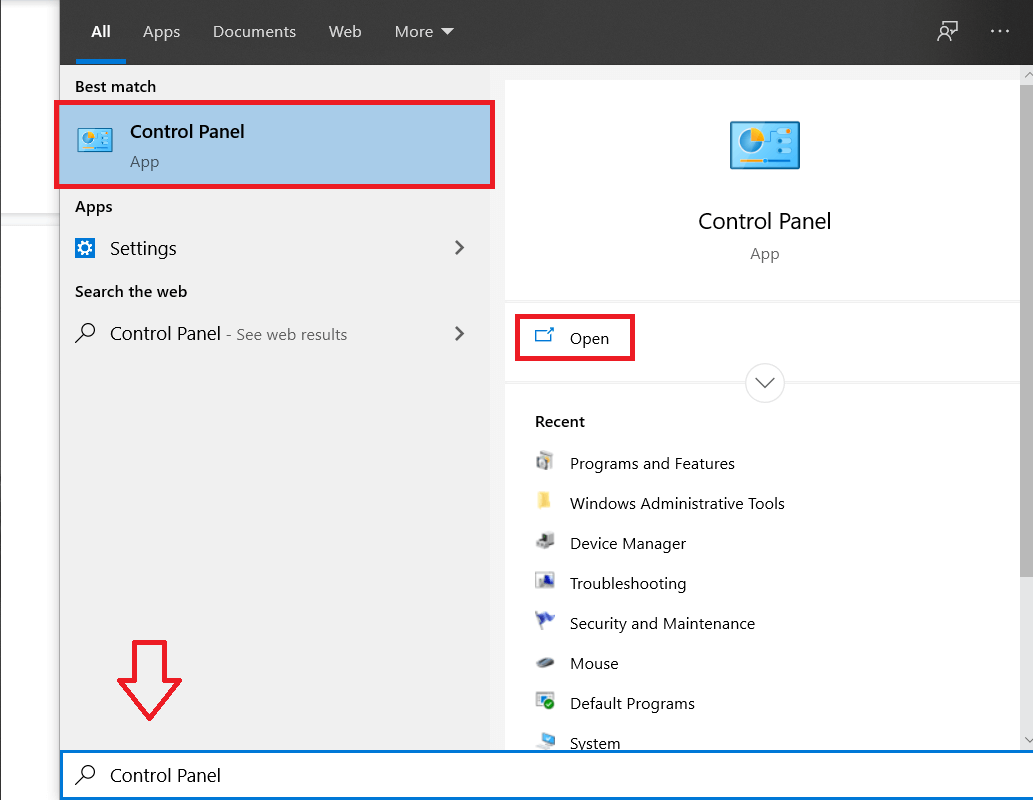
Search for the control panel from the Start Menu search bar and click on it to open the Control Panel.
Click on Uninstall a Program and then search for Realtek High Definition Audio Driver entry.
Right-click on it and select Uninstall.
Restart your PC and open Device Manager.
Click on Action then “Scan for hardware changes.”
Your system will automatically install the Realtek High Definition Audio Driver.
Method 5: Disable Microsoft UAA Bus Driver for High Definition Audio
Press Windows Key + R then type devmgmt.msc and hit enter to open Device Manager.
Expand System Devices and right-click on Microsoft UAA Bus Driver for High Definition Audio then select Disable.
Now visit Realtek to download the latest driver, and it should now install without any problem. Recommended:
Rebuild Font Cache in Windows 10 Turn Off Recent Items and Frequent Places in Windows 10 Fix Bluetooth can’t turn off on Windows 10 Fix Memory Management Error in Windows 10
That’s it you have successfully learned How to Fix Realtek High Definition Audio Driver Issue but if you still have any queries regarding this tutorial then feel free to ask them in the comment’s section.


